
| Home | Tutorials | Downloads | Forums | Links | FAQ |
| Browse |
Path Nodes, Volumes, and Zones
By: Sandcrawler| Expanding My First Map | Textures, Static Meshes, and Skyboxes |
1. Path Nodes so the zombies will leave the spawn
2. Working with some other volumes
3. Zones, and how they can be used
And
4. Play the map
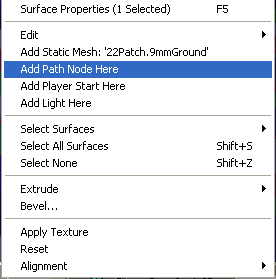
1. You remember how the Zombies wouldn't move around when we played our map last time? This is because they didn't know where to go. A Path Node tells them a path that they can follow. So lets add some to our map, go in the 3D view and go to the place you want to place one and right click. Now just Click Add Path Node here.
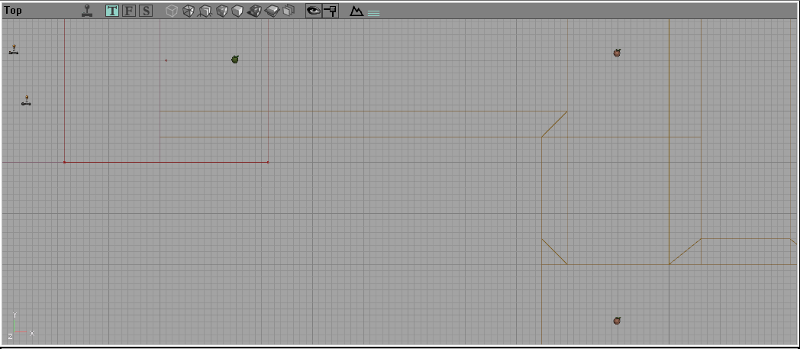
Path Nodes once placed are represented by an apple icon. There are other types of Path Nodes as well, to tell a zombie when to jump and so on. You can find these in the Actor Browser under NavigationPoint. For now we are only going to work with the basic Path Node, You'll want to place them where you want the Zombies to be able to go. I placed mine down in the trench. At every intersection you will want to place a path node in clear sight of the last one. If you have inclines you will need more path nodes to go up and down as well.
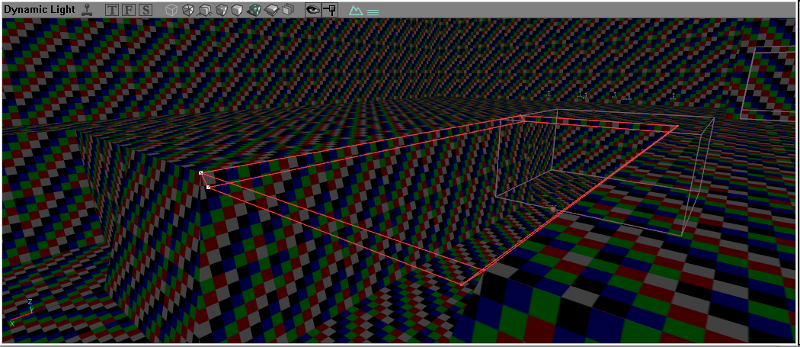
Now lets find out how we did. In your 3D viewport right click on the grey bar at the top, and go into View, then click on Show Paths. Now go into Build and push Rebuild AI Paths. With any luck you will now see your paths:

Now you can see where the specimens will be able to go in your map and make adjustments as needed. Anywhere a player can get a bot should be able to get to. You'll lea how to block players who want to get out in this next part. You may be wondering what the colors mean, I encourage you to read about them on the Unreal Wiki.
2. Now lets work with some other volumes, We have used the Shop Volume and the ZombieVolume so far. Lets work with a Blocking volume first, and then place a low gravity volume. Star by using a brush and making the shape that you need. I want to put a cover over the trench:
Now to add the blocking volume you click on the Volume button, it is under the Add button.Now just push blocking Volume, and thats all there is to adding a Blocking Volume, if you move your red Builders brush Aside you will see a lightly colored outline, this is your volume.

Lets say that you want to block a player, but you'd like the Zombies to still be able to cross, well a Blocking Volume won't do you much good. But Tripwire made a new Volume to accomplish this, its called KFZombieZoneVolume. It will block players from entering, but allow the zombie to pass threw, it can be very useful for hiding spawn zone and keeping the players out.
I want to have low gravity in the middle of the map, so you can jump higher. Thats a Volume as well, except a Physics Volume instead of Blocking. Move your building brush to the side and right click on the Physics Volume, the properties menu should open, just go to the PhysicsVolume section and open the menu for Gravity:
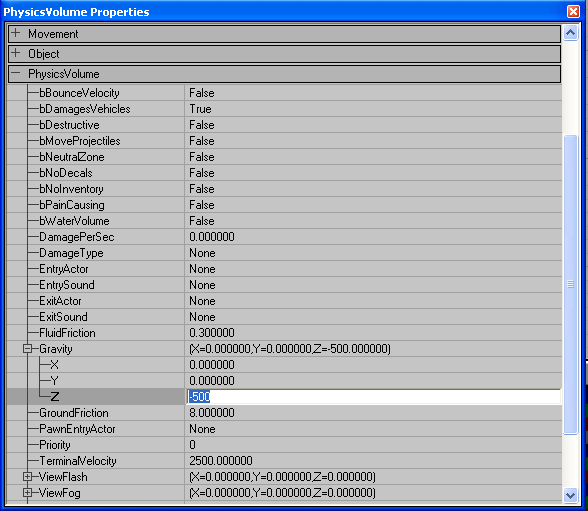
The default will be set to -950, so going to -500 reduces the gravity to give you a longer hop. You could set to to zero and once you are in the air you don't move much. Or you could set to to a positive number and you will be pulled up when you jump. It all depends on what use you have for Low Gravity. There are other types of Volumes as well, such as WaterVolume, but they are all similar to the PhysicsVolume.
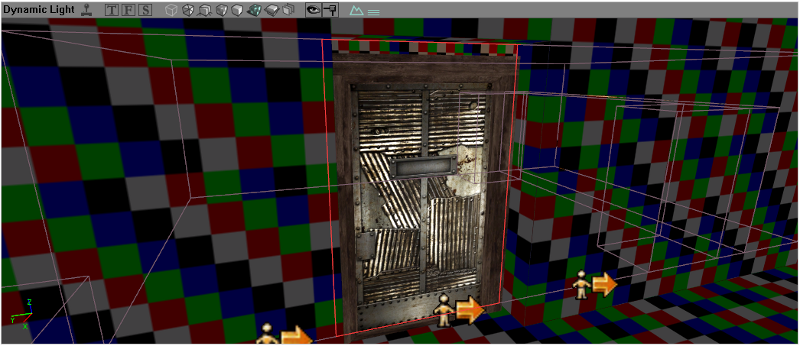
3. Now lets work with some zones. first we want to zone off parts of our map to decrease the loading time. For example the Traders shed, if we put a zone across the doorway area when you a't looking in there it won't render what is in the room. Zoning also allows you to change the ZoneInfo in each zone. First open the SheetBuilder by right clicking on it, if you remember the dimensions of the Traders door, you can punch those in and change the Axis to AX_XAsis. Otherwise you can use the mighty Vertex Editing tool. Regardless of how you get there make the sheet big enough to cover the traders doorway without overlapping.
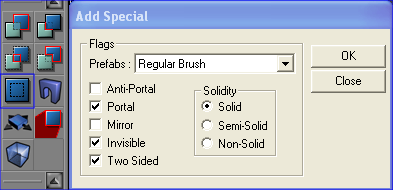
Next you need to open the Add Special Brush box, and check Portal, Invisible, and Two Sided. You may also want to change the texture to something that stands out from the texture you will be using in the map. I used the Bad Size texture that you can find in the Editor package. Your Add Special should look like this:
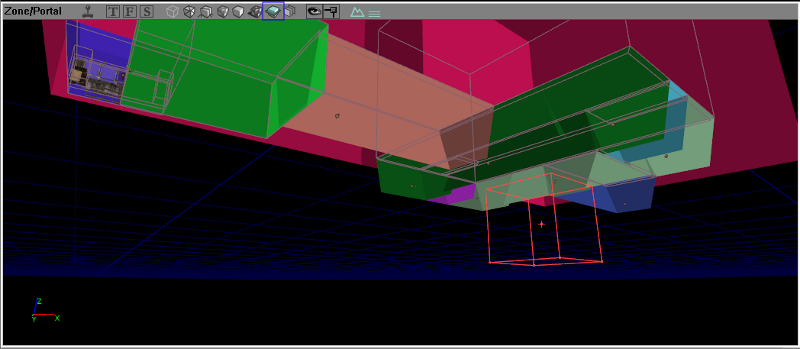
Just push ok and when you move aside your builders brush there will be a green outline, and you'll be able to see the sheet when you look in the 3D viewport. Go ahead and Build All, then change the mode on the 3D viewport to zones. Yours should now look like this:
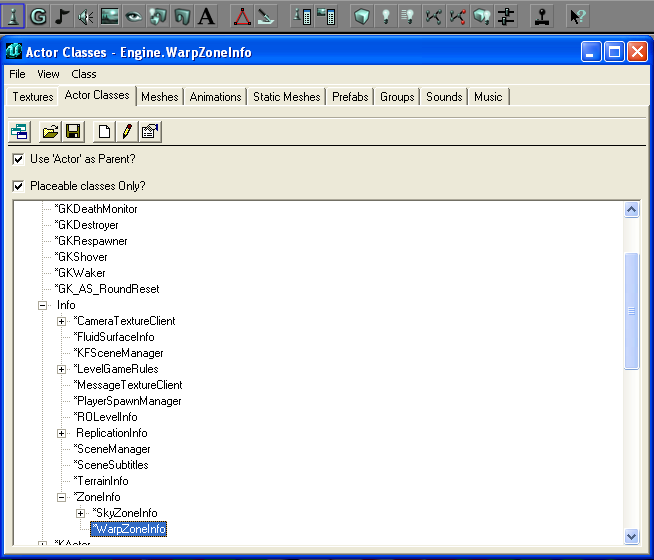
Now, lets try something new, a Warp Zone so the zombies can get onto the top floor. I have gone ahead and built the new structures that I am going to use. You can go ahead and zone these new areas off for your WarpZoneInfo. You need to find it in the Actor Browser, then simply right click in the zone you'd like it in and click Add WarpZoneInfo here.
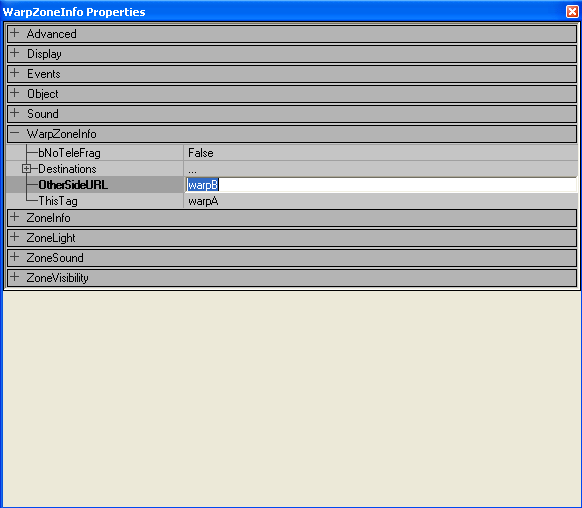
Do the same for both locations. Now lets configure them. Right click on the WarpZoneInfo actor and go into the properties menu, Then open the WarpZoneInfo section and change ThisTag to A, and OtherSideURL to B. Then open the second one and change ThisTag to B and OtherSiteURL to A. Something like this:
Thats it, you can test it now, or later but either way don't forget to add more Path Nodes in this new area for the Zombies.
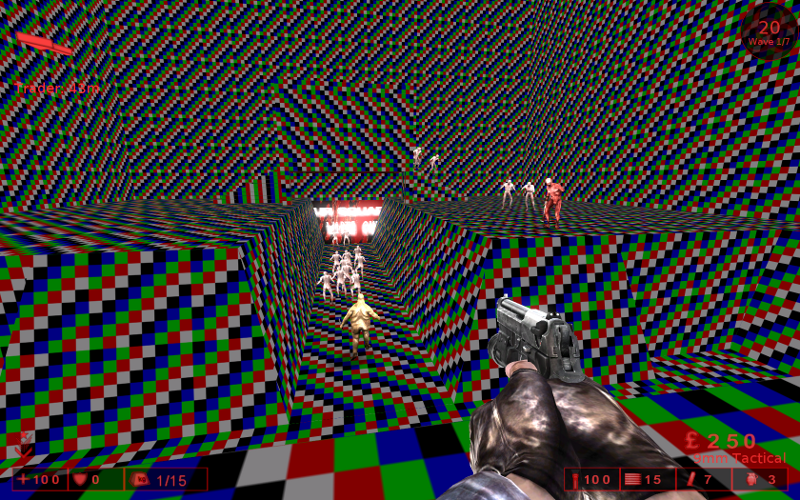
4. Now lets play the map. The Zombie got a lot smarter just by adding in the Warp zone, now they know how to get to me and so they do as you can see:
| Expanding My First Map | Textures, Static Meshes, and Skyboxes |
sandcrawler.net is not endorsed by Lucasfilm, LTD. Please read our disclaimer.
Original Content © 2006-2011 Sandcrawler.net
WAP2