
| Home | Tutorials | Downloads | Forums | Links | FAQ |
| Browse |
Expanding My First Map
By: Sandcrawler| My First Map | Path Nodes, Volumes, and Zones |
1. Add onto the map
2. Build The Traders shed
3. Add the zombie spawn
And
4. Play the Map
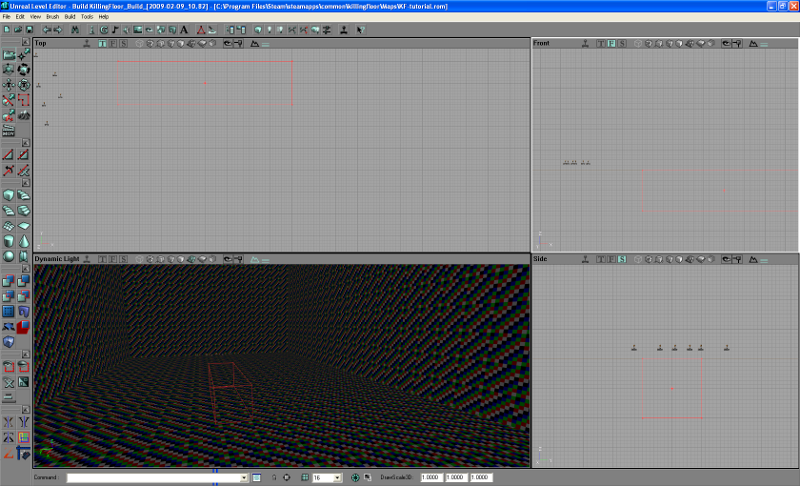
1. Lets add onto the map, I want mine to have a trench that the zombies will have to travel threw before they reach you. But you can build more rooms or some hallways instead. You should never overlap two subtraction boxes with each other, down the road this can cause you many problems, so get in close if you need to and line your new box up, with your old box regardless of what direction it is from.
At this point you could subtract the new hallway, but what fun is that. So let me introduce you to the Vertex Editing tool. This tool can be used to make ramps, or to slant the edges, I'm going to use it to slant the edges. When you are using the Vertex Tool you can click on any of the coers of your shape and move them around.
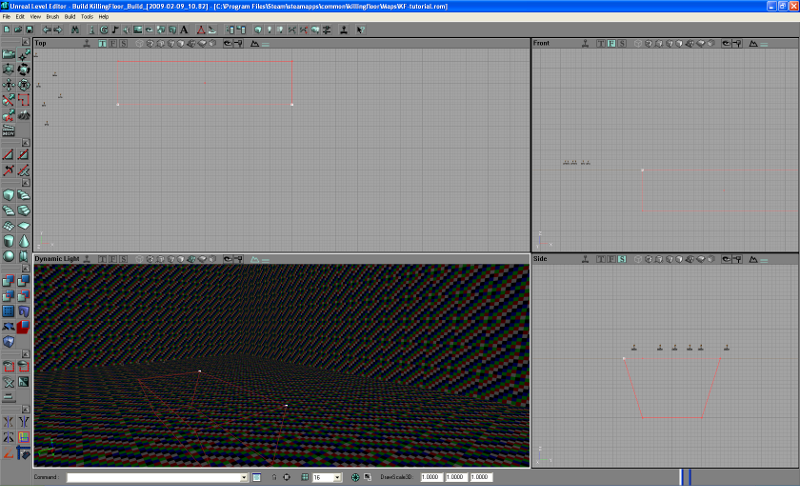
You'll notice that I have already slanted mine, you simply hold control, click and then drag in the direction you want to more the vertex too. Simple right? Now I am going to go ahead and subtract this shape, and continue adding onto my first map. You can keep this brush just by not pushing the Cube and Built buttons again. You can then move the brush by holding down control and moving your mouse in the direction you'd like to move the object. You can also rotate by holding down ctrl and then holding the right mouse button and moving the mouse left and right. That is how I got to this stage.

Now remember I told you that overlapping is bad, that is what you won't simply subtract the brush here. Let me show you the Intersect Tool This handy tool and its brother the Deintersect Tool is very useful with brushes like this. Go ahead and push it and you will see what I mean.
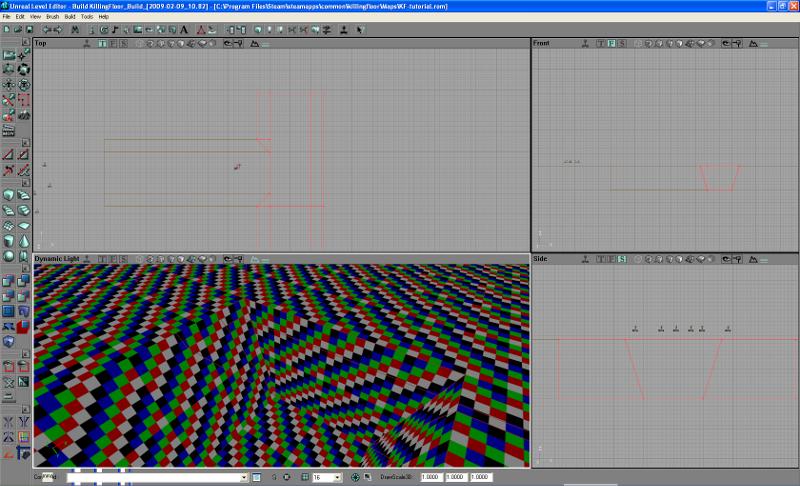
See? Now you are safe to subtract this brush, Deintersect works similarly except backwards. Now I am going to tu you lose to finish adding onto your map.
2. Now lets Build the Traders shed in my case, but you can build in the trader almost anywhere in your own map. Tripwire provided us with a Trader Example, that we can use. You'll need to open this map, so go ahead and do so. File > Open, now go up one level and then into the MappingGuide, and open the TraderExample.rom this is the trader room, and all we will be working with for now.
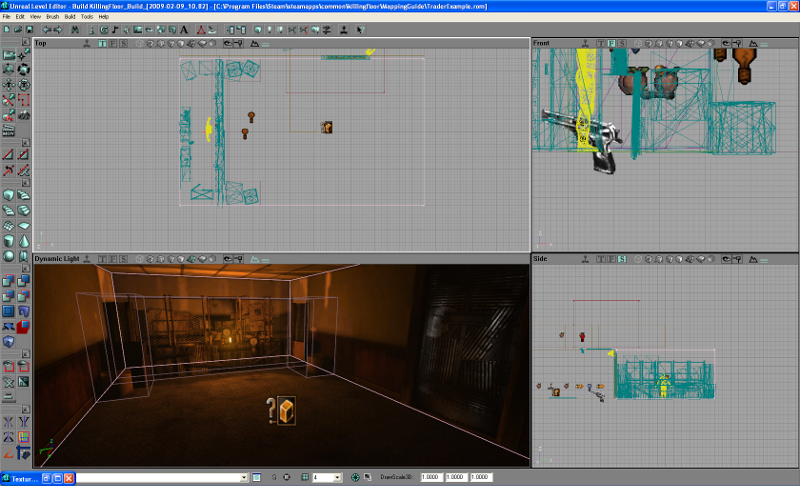
I am going to copy the trader room from this map, then we will stay consistent with the maps in the game, and save the time from setting one up as well. You'll need the zone around the room as well, and the teleporters outside of the door. Here it all is in my map:
Now we just need to build some walls around her shop, we are going to keep her door in the same location. You make your cube and size it up using the Vertex tool, except this time you are making walls around her shop, instead of making a box. So you'll be using the Add tool its right next to the Subtract tool.

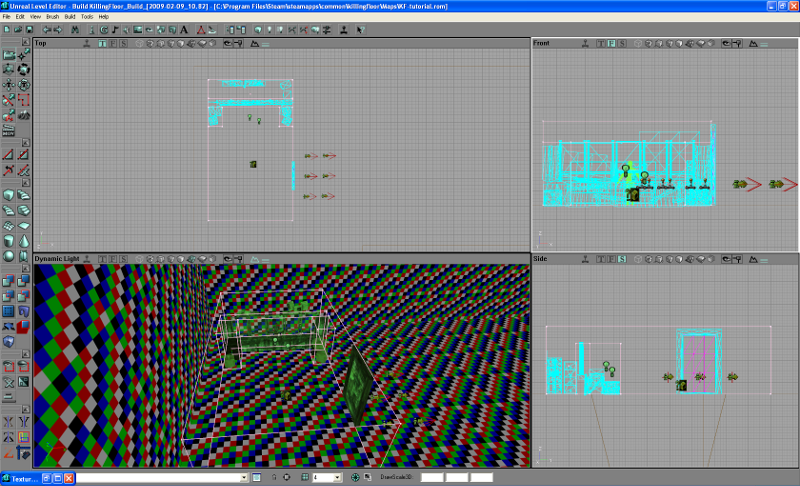
3. We can't test the Trader until we can spawn some zombie to finish the first wave. So lets get on that. Zombies are spawn in a volume similar to the Shop Volume. I'm going to make my zombies spawn right under the player spawns, and their only exit will be the trench. But you could do these just about anywhere. You'll need to make a cube first, and size that up to the size of the room you'd like the zombies to spawn in, usually you will want this out of view so the zombie can sneak up on the players. Now click on the Add Volume button and a menu will appear, select ZombieVolume:

I went ahead and changed the settings that I wanted. You can get to this menu by selecting the Volume, right clicking on it and Going to Properties.

According to the Mapping Guide provided by Tripwire this is what they do:
bDebugZombieSpawning – If true it will attempt to spawn green cylinders in the spawn volume in-game to show where specimens will spawn. If the cylinder is red that means no specimen will spawn there. Ideally you want at least 6 green cylinders so a full squad of specimens can spawn together. If you are not seeing any cylinders after setting this to true then no specimens will spawn you will need to make sure the pivot of the volume is at the center towards the bottom and is not in inside or too close to an object. Because this is a debug variable, you should make sure that all volumes in your map has this set false, before you distribute your work.
bNoZAxisDistPenalty – This determines if the ZombieVolume should be weighted for spawning specimens based on its z axis location. This should be set to true if you have a map where specimen spawns are on one level but at different heights such as on an outdoor level with gentle rolling hills.
CanRespawnTime – This value sets the minimum time between spawns on your ZombieVolume. For example, if you set this value to 6, your volume could only potentially spawn a squad of specimens once every six seconds.
TouchDisableTime – When a player comes in contact with a ZombieVolume, he disables it temporarily. This is done so that specimens don’t spawn in the immediate area a player is defending. This value simply determines how long a volume should remain disabled for once a player has touched it, before it is able to resume spawning enemies.
OnlyAllowedZeds – This is an array for spawning specific specimens only. By default, the array is empty and each ZombieVolume can spawn any kind of enemy, as determined by the server settings and wave configuration. But let’s say you wanted a certain area where only Stalkers spawned. You could add an array entry and select ZombieStalker from the dropdown list. You have now created a Stalkers-only spawning area.
MinDistanceToPlayer – This is a very important value and probably the one you will want to adjust carefully for each of your volumes. It determines how far, in units, players must be from your volume, before it is allowed to spawn any specimens. The default value is 600, which means that specimens can spawn around coers or moderately close to a player’s location. In special cases however, such as a hidden air duct above players’ heads where you want to spawn specimens, you should set this to a value of “1”, and otherwise players who are walking undeeath the duct will prevent it from spawning. In another situation, maybe you are creating a style of map where specimens spawn in the distance, and move in on players. In such a case you might set this value to something like 1500 or more.
RoomDoorsList – If you are creating a map with open/closable doors, this is a variable you should consider. In a few cases, you will have a room or area that is completely contained when the doors are shut and welded. It really wouldn’t make sense to have specimens spawning inside of this area with you, when it has been barricaded. So to prevent this, you can add entries to this array, for each perimeter door of the containable area. When a door is added to the array, its parent Volume will not spawn enemies while that door is closed or welded. If bOnlyWhenWelded is true then no specimens will spawn inside only if the door is welded. A final caveat: Do not go overboard adding doors to this array! If you associate every door in the map with a volume’s door list, it will make it difficult to spawn specimens near the player.
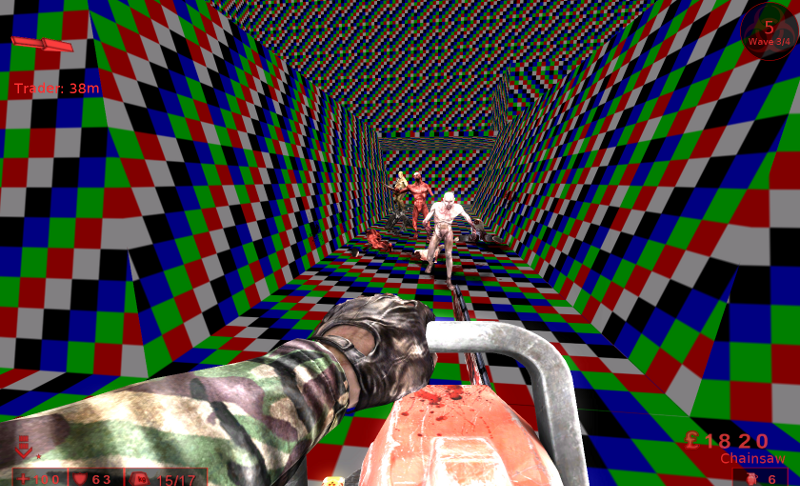
4. Let build all and play the map now. With any luck we will have a functioning trader and Zombie spawn. You will notice that when you build all your map will be darker, this is because of the ZoneInfo in the Traders house. You can edit this by right clicking and edit properties. Then go into ZoneLight and set the ambientBrightness to 100 again. You can also shut the fog off in ZoneInfo. It all worked:
| My First Map | Path Nodes, Volumes, and Zones |
sandcrawler.net is not endorsed by Lucasfilm, LTD. Please read our disclaimer.
Original Content © 2006-2011 Sandcrawler.net
WAP2